Easy Crochet Newborn Hat: Free Beginner Step-by-Step
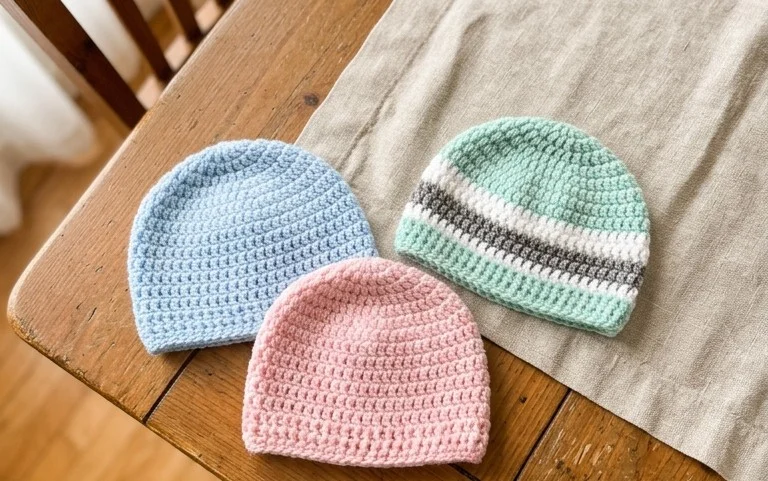
A soft, ribbed beanie keeps tiny ears warm and fits snugly during those first weeks of life. This simple project relies on working back loops to create a stretchy fabric that accommodates a growing baby while maintaining a professional appearance. You will find that this pattern is particularly satisfying because it finishes in just a few hours. Beginners often appreciate how the basic stitch creates such a clean look without requiring complicated techniques. Throughout these instructions, you will learn how to build the structure with a flat rectangle and join it into the final shape for a perfect result.
Why You’ll Love This Pattern
This classic crochet beanie provides a snug, professional fit that works up quickly using simple stitch repeats. The textured ribbing created by working in the back loops gives the hat enough elasticity to fit various head sizes comfortably. It remains a favorite project because it requires only one skein of yarn, making it an ideal choice for using up premium leftovers or trying out a new colorway. Since the design relies on basic single crochet stitches, you can focus on maintaining even tension rather than managing complex charts or color changes.
I finished this hat in a single evening while watching a movie. The instructions were easy to follow and the ribbing looks much more complicated than it actually is.
— Sarah, beginner crocheter
Pattern Overview & Skill Level
- Skill Level: Beginner
- Approximate Time: 3 to 4 hours
- Construction: Worked as a flat rectangle, then seamed into a tube and cinched at the top
- Finished Dimensions & Sizing: 18 inches circumference, 9 inches height (fits average adult head)
Materials & Supplies Needed
- Yarn: Worsted weight (#4), 100% wool or acrylic blend, approximately 200 yards.
- Hook Size: 5.0 mm (H-8).
- Notions: Tapestry needle, locking stitch marker, scissors, and a pom-pom maker if desired.
- Safe yarn substitutions: You can use any worsted weight cotton, though it will result in a heavier, less stretchy hat. A bulky weight yarn will significantly change the size, requiring you to reduce the starting chain length by 4-6 stitches to maintain the fit.
Stitch Guide & Abbreviations (US Terms)
- ch = chain
- sc = single crochet
- BLO = back loop only: insert hook under only the back loop of the stitch
- st(s) = stitch(es)
- sl st = slip stitch
- FO = fasten off
Step-by-Step Pattern Instructions
Main Hat Panel
- Row 1: Ch 41. Sc in second ch from hook and in each ch across. (40 sts)
- Row 2: Ch 1, turn. Sc in BLO of each st across. (40 sts)
- Rows 3–60: Repeat Row 2 until the piece measures approximately 18 inches when slightly stretched.
- Finishing: FO, leaving a long tail of 12 inches for assembly.
Assembly
- Fold the rectangle in half so that the short ends meet.
- Using the long tail and your tapestry needle, whip stitch the two short ends together to create a tube.
- With the same yarn, weave your needle through every other stitch along the top edge of the tube.
- Pull the yarn tightly to gather the top closed, securing it with a knot on the inside.
- Weave in all remaining ends securely to prevent unraveling.
Care & Washing Instructions
- Hand wash in cool water using a gentle wool detergent to maintain fiber integrity.
- Lay the hat flat on a dry towel, patting it into shape rather than wringing it out.
- Avoid hanging the hat to dry, as this will stretch the fabric and distort the ribbing pattern.
Pro Tips & Common Mistakes to Avoid
Maintain consistent tension throughout the project by keeping your yarn flow steady; irregular tension leads to uneven ribbing edges. Use a stitch marker on the first stitch of every row to ensure you do not drop stitches at the turning point, which is a frequent error that results in a trapezoid shape rather than a rectangle. Weave your ends in by moving the tapestry needle in a zigzag pattern through the stitches on the inside of the hat to keep the seam invisible. If you decide to adjust the size, add or subtract chains in multiples of two; adding 4 chains adds approximately one inch to the total circumference of the hat.
Frequently Asked Questions
Can I substitute a different yarn weight for this pattern?
Changing the weight will affect the gauge. If you use a lighter weight yarn, increase the starting chain length until it measures 18 inches. If you use a heavier yarn, decrease the number of starting chains until it reaches the same length.
Is this project suitable for a complete beginner?
Yes, this pattern uses only the single crochet stitch and the back loop only technique. It is an excellent way to practice even tension and clean edge finishing.
How do I wash the hat if I used a wool blend?
Wool blends require hand washing in cool water. Always use a dedicated wool wash and avoid agitation to prevent the fibers from felting or shrinking.
Can I sell items made from this pattern?
You are welcome to sell finished items created from this pattern. Please credit the design to this tutorial when listing your products online.
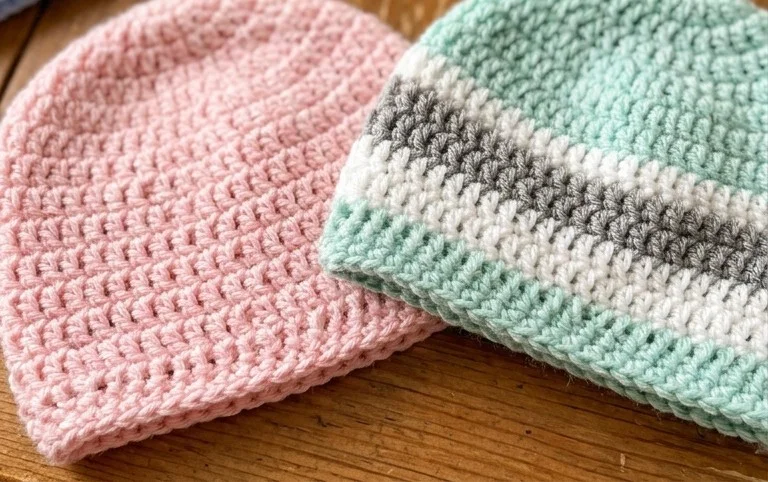
This tiny cap makes a thoughtful gift that shows off your handmade work and provides real utility for new parents. You can experiment with a soft cotton blend for warmer climates or add a faux fur pom-pom to give it a whimsical touch. Once you finish your project, please share a picture of your creation on social media so others can see your color choices. Browse my other collection of free patterns on the blog whenever you feel ready to start your next creative project.