Easy Beginner Crochet Coasters: Free Pattern & Materials
A fresh, cotton coaster sitting on a coffee table brings a sense of accomplishment to any room. These little circles have a firm, thick structure that catches condensation without soaking through, keeping your wood surfaces dry. Beginners find this project approachable because it focuses on a single, rhythmic motion that creates a consistent and tidy finished look. Gift makers appreciate how quickly these come together during a quiet evening, while home decor lovers enjoy picking shades that match their seasonal style. You will learn the technique for working in joined rounds to create a smooth, flat circle that does not curl or bunch up at the edges after regular use.
Why You’ll Love This Pattern
This beginner-friendly crochet coaster pattern uses simple, repeated stitches to create a dense, absorbent fabric perfect for protecting your furniture from drink condensation. Because it relies on basic single crochet stitches worked in joined rounds, it is an ideal project for practicing consistent tension without the complexity of color changes or shaping. You can complete a single coaster in less than thirty minutes, making it a highly rewarding scrap-yarn project that puts small leftover balls of cotton yarn to good use. The finished coasters have a clean, circular shape that sits flat on any surface and is sturdy enough to withstand frequent use.
I managed to finish a full set of four coasters in one afternoon using yarn from my stash. The instructions were easy to follow and the finished result looks professional and tidy.
— Sarah, home crafter
Pattern Overview & Skill Level
- Skill Level: Beginner
- Approximate Time: 20-30 minutes per coaster
- Construction: Worked in joined rounds, starting from a center ring and increasing outwards to create a flat circle.
- Finished Dimensions: Approximately 4 inches (10 cm) in diameter
Materials & Supplies Needed
- Yarn: Worsted weight (#4) 100% cotton yarn, approximately 15-20 yards per coaster. Cotton is essential for heat resistance and moisture absorption.
- Hook Size: 5.0 mm (US H-8) crochet hook.
- Notions: Tapestry needle for weaving in ends, scissors, and a stitch marker to track the start of each round.
- Yarn substitutions: You may use an acrylic blend if you only need them for decor, but synthetic fibers will not absorb moisture as well as cotton and may melt if exposed to very hot mugs. Using a DK weight yarn will result in a smaller coaster, while bulky weight yarn will require a larger hook and fewer rounds to reach the same size.
Stitch Guide & Abbreviations (US Terms)
- ch = chain
- st/sts = stitch/stitches
- sl st = slip stitch
- sc = single crochet
- inc = 2 sc in the same stitch (increase)
- MR = magic ring
Step-by-Step Pattern Instructions
Coaster Body
- Rnd 1: Start with a MR. Ch 1, work 6 sc into the ring. Join with a sl st to the first sc. (6 sts)
- Rnd 2: Ch 1, inc in each st around. Join with a sl st to the first sc. (12 sts)
- Rnd 3: Ch 1, *inc in next st, sc in next st; repeat from * around. Join with a sl st to the first sc. (18 sts)
- Rnd 4: Ch 1, *inc in next st, sc in next 2 sts; repeat from * around. Join with a sl st to the first sc. (24 sts)
- Rnd 5: Ch 1, *inc in next st, sc in next 3 sts; repeat from * around. Join with a sl st to the first sc. (30 sts)
- Rnd 6: Ch 1, *inc in next st, sc in next 4 sts; repeat from * around. Join with a sl st to the first sc. (36 sts)
- Rnd 7: Ch 1, *inc in next st, sc in next 5 sts; repeat from * around. Join with a sl st to the first sc. (42 sts)
Finishing
Fasten off your yarn, leaving a 6-inch tail. Use your tapestry needle to pull the yarn through the final stitch and weave it securely into the back of the coaster. Trim any excess yarn close to the fabric to ensure the bottom remains flat.
Care & Washing Instructions
- Machine wash on a gentle cycle in cool water to prevent the cotton fibers from shrinking or fading.
- Lay the coasters flat on a clean towel to air dry, reshaping them with your hands while damp to ensure they remain perfectly round.
- Avoid using fabric softener, as it leaves a waxy residue on the cotton fibers that reduces the coaster’s ability to absorb moisture.
Pro Tips & Common Mistakes to Avoid
Maintain consistent tension by holding your yarn with a steady grip throughout each round. If your coaster begins to curl like a bowl, your tension is likely too tight; try moving up to a slightly larger hook size to allow the stitches more room. To keep your work organized, always place a stitch marker in the first stitch of each new round so you know exactly where to join with your slip stitch. If you wish to make the coaster larger, continue the increase pattern by adding one additional single crochet between each increase in every subsequent round, but note that this will require more yarn.
Frequently Asked Questions
Can I use a different yarn weight for this project?
Yes, but you will need to adjust the hook size accordingly. If you use a lighter yarn weight, such as sport or DK, the coaster will be smaller unless you add additional increase rounds.
Why is my coaster wavy instead of flat?
A wavy edge typically indicates too many stitches. Ensure you are following the increase pattern correctly and not accidentally adding extra stitches to the rounds.
Is this project suitable for a total beginner?
This is a great first project. It focuses on the fundamental skills of working in the round and increasing, which are the building blocks for many larger amigurumi and circular projects.
Can I sell the finished coasters?
You are welcome to sell finished items made from this pattern. I ask that you credit the pattern design to my shop whenever possible.
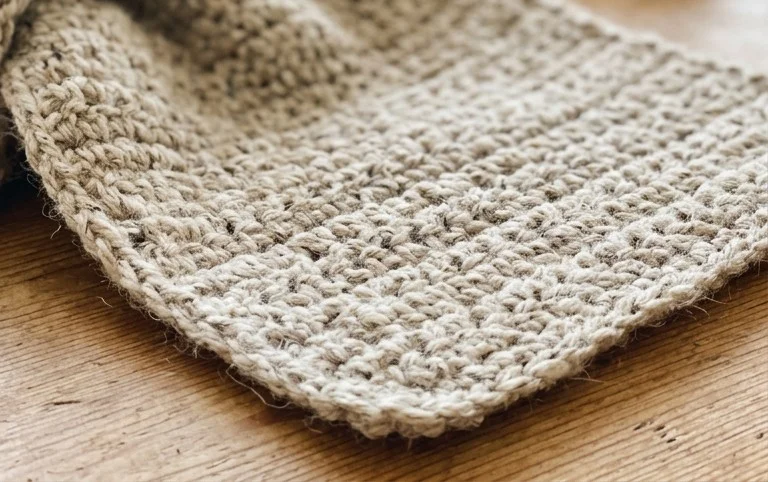
Your finished set of coasters adds a handmade touch to your living room and works well for protecting surfaces from cold glasses or warm mugs. If you want to experiment with the design, try using a variegated cotton yarn to create unique color stripes in each round. Please post a photo of your finished coasters on social media so others can see your color choices. You can find more free patterns for other useful home items on the blog to fill your weekend with simple, rewarding projects.